Hazards are a tool in vWork's Health & Safety feature. Health & Safety is an optional feature in vWork. If you would like to find out more about it or add it to your account, please email support@vworkapp.com. One of our team will be in touch to talk with you about your requirements.
In this article
- What are Hazards in the Health & Safety feature?
- What is the process to set up Hazards in vWork
- Review and customize the hazard settings
- Create and edit the Hazards Library
- Add hazards to the Hazards library?
- Add hazards to Assets
- Hazard Alert: Residual Risk Created
There is a lot of information here. You can use the links above to take you directly to the topic you are interested in.
Return to this menu at any time by clicking this icon:
What are Hazards in the Health & Safety feature?
Hazards are any element related to a job that adds a physical and financial risk to workers, other people, or property. Examples of Hazards include unstable ground, fire, moving equipment or materials at height, working with chemicals, working at height, powerlines and other electrical hazards, gas pipes, and so on. Hazards vary from industry to industry and the controls for managing and mitigating the risks that come with hazards also vary. Hazard management is often legally regulated.
How are Hazards managed in vWork?
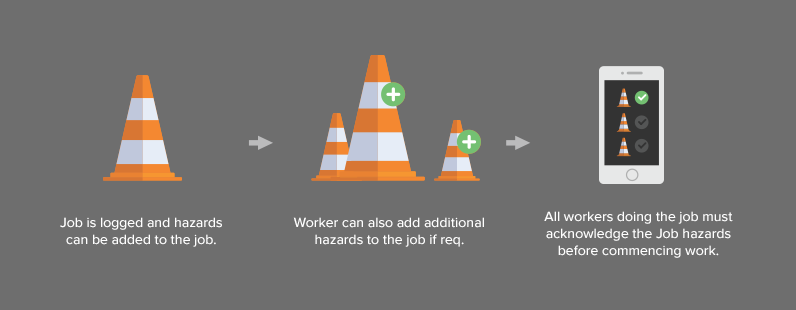
Our Hazards tool enables dispatchers and workers to identify, record, and manage hazards on a job. The Hazards tool makes sure that workers don’t move to the next step on a job until all hazards are acknowledged. This can also include capturing the signatures of key people involved in the job as proof that they have made a risk assessment and taken responsibility for the risks generated by hazards.
Hazards can be identified and recorded against a job before it begins and also in the field as new hazards are identified. In both instances, vWork guides workers to make sure appropriate controls are implemented to mitigate the risks created by hazards.
What is the process to set up Hazards in vWork
Make sure Health & Safety is enabled in your account
Before you can start using Hazards you must have the Health & Safety feature added to your account. Our support team can help with this. Email support@vworkapp.com for more information.
Once Health & Safety is added to your vWork account you must enable the Health & Safety Settings. The process for doing this is explained in the article: How do I turn on Health & Safety?
Set up the Hazards tool in your account
To set up H&S Hazards in vWork you will:
- Review and customize the Hazard settings including the Hazard Declaration, Risk Levels to assign to hazards, and Control measures used to mitigate risks.
- Create a Hazards library to enable you to quickly add common hazards from your industry to your jobs. You can create hazards in your library one at a time or bulk import a list of hazards using a CSV file.
Once these things are set up you can start adding Hazards to your jobs. The next topics explain how to set these up.
Review and customize the hazard settings
What are the hazard settings?
We have created default hazard settings in the Health & Safety Settings tab. If these don’t meet your needs you can easily customize them.
There are three settings to consider:
- The Hazard Declaration
This is a declaration that you can customize to say whatever you want.
You can include optional and required Declaration Signatures to support this statement if needed. These are captured by workers through their mobile app. - The Risk Levels you assign a Hazard
Dispatchers or workers assign a risk level to a hazard as:
-
- an Initial Risk to identify the risk the hazard poses before control measures are taken to mitigate the risk, and
- a Residual Risk that remains with the hazard after control measures are applied to mitigate the risk it poses.
- The Control measures
These are the measures a worker can apply to mitigate risk and reduce the risk level posed by a hazard to an acceptable Residual Risk level.
Review and customize the Hazard Declaration
The Hazard Declaration is the statement that you include with the job for relevant people involved with the job to agree to. While it is not necessary, you can add required or optional signatures to the Hazard Declaration that a worker captures in the mobile app when they are on the job.
We have provided a default Hazard Declaration which you can use, or you can customize the declaration to suit your specific requirements.
To review and customize the Hazard Declaration:
- Go to Settings > Health & Safety> Settings.
- Read the default Hazard Declaration:
- If you want to use the default you don’t need to do anything else.
- If you want to customize it, click in the Hazard declaration field and make the changes that you want.
- Click Save if you have made changes.
The Hazard Declaration and the Hazard Acknowledgment
Mobile workers have a Hazard Acknowledgment that shows for every job on their vWork mobile app where the job template has Hazards enabled. The Hazard Acknowledgment prompts the worker to review all the fields for each hazard and, where required, complete any missing information in the fields.
The Hazard Acknowledgement on the vWork mobile app is different from the Hazard Declaration described in the topic above. The worker must always complete the hazard review and the Hazard Acknowledgment before they can proceed to the next step in the job even if there is no requirement to capture signatures for the Hazard Declaration. Both the Hazard Acknowledgement and the Hazard Declaration show on the H&S screen in the mobile app. For an example, see the screenshot below taken from the vWork mobile app installed on an Android device.
Note: The Hazard Acknowledgement is a checkbox in Android and a toggle button in IOS.
The Hazard Declaration can be used in several ways to supplement the Hazard Acknowledgment. Here are four examples of how it could be used:
- You are in a high-risk industry and have a Hazard inspection checklist your workers must complete prior to adding Hazards to a job through the mobile app. You have set this up as an H&S Event template. Your workers create an H&S event based on this template as a step on every job. When they have completed the Event hazard Inspection checklist they sign the Hazard Declaration that states they have completed it. They then complete any blank fields for each Hazard and acknowledge the Hazards by completing the Hazard Acknowledgement.
- Your work is relatively low risk and your workers like things kept simple. Completing the Hazard Acknowledgement is acknowledgment workers have completed all fields for the Hazards and they have read and accepted the Hazard Declaration. No signatures are required.
- You have several people involved in managing risks for hazards on the job. You want all people involved to acknowledge that they understand the hazards and risks and have a record or their signatures to prove this. You include required signatures for these people that they sign through the mobile app to accept the Hazard Declaration. Workers must complete the Hazard Acknowledgement once they have completed all fields for each Hazard and captured signatures for the Hazard Declaration.
- You only require your workers to complete fields for the identified Hazards. You don’t require a Hazard Declaration. You delete the default Hazard Declaration in the settings so this field is blank in the mobile app. Workers must still complete the Hazard Acknowledgement once they have completed all fields for each Hazard.
Review and customize the Risk picklist
The items shown in the Risk picklist are the default options to select from when an Initial Risk and Residual Risk are assigned to a hazard.
The default list has five settings that range from Very Low to Critical.
If this list doesn’t represent the risk levels that you assign to hazards you can edit the list in the following ways:
- Edit the text of an existing item in the list
- Delete an item
- Add an item.
Note: Edits you make to the list will not change Risk levels already assigned to hazards in the library or saved with existing jobs. They will change the options available in the picklist if you need to change the Initial Risk or Residual Risk already assigned to a hazard on an existing job.
To customize the Risk picklist:
- Go to Settings > Health & Safety> Settings.
- To edit the text for an existing item, click on the item and type over the existing text with a new description.
- To delete an existing item click Delete next to the item.
- To add a new item to the end of the picklist, click Add Item. A new field will appear. Type the text you want in the field.
🔔Important: Make sure you don't add a space at the end of any picklist item that you add or edit. Extra spaces after or between words can stop vWork from correctly matching a value in a field in a hazard import CSV file to a hazard picklist item. This can prevent a hazard from importing into vWork. - Click Save when you have made all the changes you want to the list.
Note: The order you see items listed in the Risk picklist is the same order used when you select an initial risk or a Residual risk to assign to a hazard. If you want to change the order of items you can do this by deleting and adding new items to the list and editing the existing items.
Review and customize the Control picklist
The items shown in the Control picklist are the default options to select from when you choose a Control Type to mitigate the risk created by a hazard. We provide a default standard list of Control Type options.
If this list doesn’t represent the Control Types that you would use you can edit the list in the following ways:
- Edit the text of an existing item in the list
- Delete an item
- Add an item.
Note: Edits you make to the list will not change Control Types already assigned to Hazards in the library or saved with existing jobs. They will change the options available in the picklist if you need to change the Control Type already assigned to a hazard on an existing job.
To customize the Control picklist:
- Go to Settings > Health & Safety> Settings.
- To edit the text for an existing item, click on an item and type over the existing text with a new description.
- To delete an existing item click Delete next to the item.
- To add a new item to the end of the picklist, click Add Item. A new field will appear. Type the text you want in the field.
- Click Save when you have made all the changes you want to the Control type list.
Note: The order you see items listed here is the order they will show on the picklist when you specify a Control type to manage risk for a hazard. If you want to change the order of items you can do this by deleting and adding new items to the list and editing the existing items.
Create and edit the Hazards Library
You can add hazards to a Hazards Library in the Health & Safety Hazards tab. Dispatchers use this library to quickly add common hazards to Jobs and Job templates. Mobile workers can also select hazards from this library in their mobile app to add to jobs as they identify them on the job.
Note: Other custom hazards can be added to jobs by dispatchers and mobile workers that aren’t saved in the library, but the library can save a lot of time and decision-making when adding commonly found hazards to a job.
What is the information captured for a hazard?
Hazards have risks that need to be managed to mitigate the risk they present. The information you capture about a risk records what the risk level is and how the risk is managed. When you create a hazard we capture this information using the following fields that are saved with the hazard.
|
Description |
Give the hazard a brief description to easily distinguish it from other hazards in the Hazards Library. This is the only field that must be completed when you create a new hazard in the library. |
|
Initial Risk |
The level of risk assigned to the hazard before control measures are put in place to manage the risk. When you assign an Initial Risk level to a hazard you select it from a picklist that represents a scale of severity. The Risk picklist is saved in the Health & Safety Settings tab. The value entered here must match the options given in the Risk picklist. To find out more take a look at the topic Review and Customize the Risk picklist, above. |
|
Control Type |
The control measures that are used to mitigate the risk created by the hazard. When you assign a Control Type to a hazard you select it from a picklist. The Control picklist is saved in the Health & Safety Settings tab. The value entered here must match the options given in the Control picklist. To find out more take a look at the topic Review and Customize the Control picklist, above. |
|
Controls required |
This is a more detailed description of how the Control Type will be used to mitigate the risk. For example, if the Control Type selected was Use PPE the Controls required might be to wear a face shield, N95 respirator, nitrile disposable gloves, and disposable hooded overalls. |
|
Person Responsible |
This is a specific person involved with the job. The Person Responsible is recorded as the person who ensures the risk created by a hazard is managed as expected. |
|
Residual Risk |
This is the risk level that remains after all Control measures are taken to mitigate the risk. This is selected from the same picklist that is used to establish the Initial Risk. |
|
Custom fields |
Optionally, you can also add custom fields to save information that is specific to a particular hazard. |
Note: Other than the Description you don’t need to save information in any of these fields when you create a hazard in the Hazard Library. The information you save in the fields can be edited from the job if needed. This gives you discretion as to how much input dispatchers and workers have in determining risk levels and how these are managed for a hazard. The more information you save with the hazard the less work (and thought) your dispatchers and workers need to do to decide on risk levels and control type measures. You have the flexibility to determine what works best.
Add hazards to the Hazards library?
Hazards are added to the Hazards library in the Health & Safety Hazards tab in three ways:
- You can manually create hazards - this process is explained next.
- You can bulk import hazards using a CSV file - this process is explained in the article, How to import hazards in bulk.
- You can add hazards via the API
Add a hazard to the Hazards library manually
To add a hazard to the Hazards library manually:
- Go to Settings>Health&Safety>Hazards.
- Scroll to Create Hazard.
- Add a Description. This is the only field you must complete. It is useful to distinguish different hazards from one another.
- Enter the information you want for any other fields. See the table above for a description of the purpose of each field.
- Add custom fields if these are needed to the hazard using the Add Field button.
For example, Notes, Photos. - Click Save when you have added all details for the hazard.
The hazard will show in the My Hazards list at the bottom of the Hazards tab.
Add hazards and an optional Declaration Signature to a job or job template
You add Hazards to job templates when these hazards are commonly present on a job. Alternatively, you can add a hazard to a job at the time it is created, or on the mobile app once the job is published.
You can also add an optional Declaration Signature. This is used to capture the signatures of named people as proof they have read and agreed to the Hazard Declaration. A Declaration Signature can also be added at any time including on the mobile app by the worker.
Add Hazards
You can add as many hazards as you need to a job or job template.
Note: You must enable hazards in the job template before you can add hazards to jobs based on the job template.
Enable Hazards on the job template
To enable hazards on a job template:
- Go to Settings>Templates>Jobs and either select an existing template or click Add Job Template to create a new one.
- Go to the Health & Safety tab.
- In the Hazards section click to enable hazards in the template.
Add Hazards to a job or job template
- Go to the Health & Safety tab in the job or job template.
- Click Add a Hazard to open the Hazards section where you can add a new hazard’s details.
- Click
to expand the section if the Add a Hazard button is not visible.
- Click
- Enter the hazard’s details:
• You can easily add a hazard from the Hazards Library. Start typing the hazard’s description in the Description field then click to select it from the options presented. Complete the hazard fields as required.
• Alternatively, you can create a custom hazard by typing a new description in the Description field. Complete the remaining fields as required.
Note: For a description of the purpose of each field please refer to the table above under the heading: What is the information captured for a Hazard? Any fields left blank must be completed by the worker on the vWork Mobile app before the worker can complete the Hazard Acknowledgement checkbox and move to the next step on the job. - Click Add Field to add an additional field for the Hazard if this is required.
- Click Create, Save or Update to save the Hazard(s).
Note: Hazards can also be added to the job from the mobile app. This is explained in the articles:
- Health & Safety: Managing hazards on the Android mobile app
- Health & Safety: Managing hazards on the IOS mobile app.
Add a Declaration Signature to a hazard
A Declaration Signature confirms that the named signatories have read the Hazard Declaration (saved in the Health & Safety Settings tab) and agree with it.
- Declaration Signatures can be Required or Optional. If they are Required the worker can’t move to the next step until all Declaration Signatures have the name and signature fields completed and the Hazard Acknowledgement is also completed on the vWork mobile app.
- Declaration Signatories can include the mobile worker but don’t need to. They should be the people involved with the job who have responsibility for managing the risks created by the job.
Note: The mobile worker is always required to complete the Hazard Acknowledgment checkbox. - You can add multiple Declaration Signatures to a Job or Job Template.
- Declaration Signatures can also be added by the worker on the vWork mobile app. These are recorded as optional signatures against the job.
- The name of the signatory can be both edited and added through the mobile app once the job is published.
To add the Declaration Signature to a job or job template:
- Go to the Health & Safety tab for the job or job Template.
- Scroll down to the Declaration Signature section of the tab. If the section is collapsed, click
- In the Person’s name field type the name of the person you want to sign the declaration. In the example below, the signatory is Claire Waters.
- In the Required field select either Required (the default) or Optional to specify if the Declaration Signature must be completed.
- Click Add Signature to add more Declaration Signatures.
- Click Update or Save to save the Declaration Signature(s) to the job or job template.
Note: a Declaration Signature can also be added to the job from the mobile app. This is explained in the articles:
- Health & Safety: Managing hazards on the Android mobile app
- Health & Safety: Managing hazards on the IOS mobile app.
Set a job step to trigger the Hazard Acknowledgement
When a job has hazards saved with it, the worker can’t complete the step that includes the hazards until they have completed the Hazard Acknowledgement checkbox on the mobile app at that step. In order to complete the Hazard Acknowledgement, they must complete a hazard review where they make sure all fields are completed for all hazards.
By default, the first step includes the Hazard Acknowledgement. You can choose to assign the Hazard Acknowledgment to another step from the Job Information tab on a job template.
To set a job step to trigger the hazard review on a job you must set the trigger step in the job template:
- Go to the Job Information tab on the job template.
- Scroll down to What steps must the worker complete?
- Tap
next to the step where you want the workers to conduct their hazard review.
In this example, the worker will conduct the hazard review when they begin Step 2: Arrive at site. - Click Update or Save.
Note: Where no Hazards are saved against a job yet, and the job template has Hazards enabled, the mobile worker will still need to complete the Hazard Acknowledgment checkbox to confirm there are no hazards on the job.
Add hazards to Assets
Just as you can add hazards to jobs, you can also add them to Assets. You can learn how to add a hazard to an Asset in the article: Health & Safety: Assets with Hazards.
Note: for a hazard saved against an Asset to be included in a job, the job template must have Health & Safety enabled.
Hazard Alert: Residual Risk Created
The Residual Risk Created alert is a Health & Safety alert for use specifically with Health & Safety Hazards. Its purpose is to notify selected parties when the Residual Risk for a hazard saved with a job meets or exceeds a specified level following the implementation of control measures to mitigate the risk. You can find out more about this in the article: Health & Safety Hazard alert: Residual Risk Created